Hello. My name is Matt and, well, I'm very indecisive. When I first started my blog I was so excited and so happy to post stuff. Since I moved this past summer I haven't posted as much as I would have liked. It's not that I don't love posting about food because I do its just I've been kind of blah about posting. I'm hoping it is because of work, but it could be because I'm lazy lol.
I also want to make sure I give my readers good information and sometimes I feel like I am so confusing. I like to eat healthy, and preach how its good to take care of yourself, but I love making desserts. I also don't own an expensive camera and take very normal candid shots.
So anyways after this long rant. I have some decisions to make and it will have to determine if I want to continue to post or not. I will do my best to try and so on that note just keep checking back because you never now.
M-

Friday, February 1, 2013
Monday, October 1, 2012
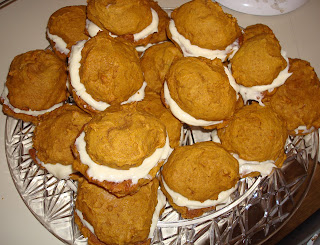
Happy October!! Yet again, Pumpkin Whoopie Pies
Hello all!! I must say it has been a long time since I posted. I've been meaning to post but I just have not got around to it. I kind of lost my inspiration for awhile, but in the back of my mind I knew I wanted to get back into posting my food. I have made quite a bit of food and I am so excited to share again. I have also made lots of sweets. I have been on the search for the perfect, moist, yellow cupcake. Its been tough, but I have found a few good recipes.
Since it is October, I know I should be posting a new recipe, but I really love this recipe and wanted to share it again. Pumpkin Whoopie pies. I have included the link to the recipe. I really like this recipe so I didn't change it.
I want to thank you guys for coming and hope you come back!!!
Ingredients/Recipe
Recipe from Rachael Ray
1 1/2 sticks (6 ounces) unsalted butter, 1 stick melted, 1/2 stick softened
1 cup packed light brown sugar
2 large eggs, at room temperature, lightly beaten
1 cup canned pure pumpkin puree
1 tablespoon pumpkin pie spice
1 1/2 teaspoons pure vanilla extract
1 teaspoon baking powder
1 teaspoon baking soda
3/4 teaspoon plus 2 pinches salt
1 2/3 cups flour
4 ounces cream cheese, chilled
1 cup confectioners' sugar
Thanks guys and enjoy!!!
Since it is October, I know I should be posting a new recipe, but I really love this recipe and wanted to share it again. Pumpkin Whoopie pies. I have included the link to the recipe. I really like this recipe so I didn't change it.
I want to thank you guys for coming and hope you come back!!!

Ingredients/Recipe
Recipe from Rachael Ray
1 1/2 sticks (6 ounces) unsalted butter, 1 stick melted, 1/2 stick softened
1 cup packed light brown sugar
2 large eggs, at room temperature, lightly beaten
1 cup canned pure pumpkin puree
1 tablespoon pumpkin pie spice
1 1/2 teaspoons pure vanilla extract
1 teaspoon baking powder
1 teaspoon baking soda
3/4 teaspoon plus 2 pinches salt
1 2/3 cups flour
4 ounces cream cheese, chilled
1 cup confectioners' sugar
Directions
- Preheat the oven to 350 degrees . Line two baking sheets with parchment paper.
- In a large bowl, whisk together the melted butter and brown sugar until smooth. Whisk in the eggs, pumpkin puree, pumpkin pie spice, 1 teaspoon vanilla, the baking powder, the baking soda and 3/4 teaspoon salt. Using a rubber spatula, fold in the flour.
- Using an ice cream scoop or tablespoon, drop 12 generous mounds of batter, spaced evenly, onto each baking sheet. Bake until springy to the touch, about 10 minutes. Transfer to a rack to cool completely.
- Meanwhile, using an electric mixer, cream the softened butter with the cream cheese. Add the confectioners' sugar and the remaining 2 pinches salt and 1/2 teaspoon vanilla; mix on low speed until blended, then beat on medium-high speed until fluffy, about 2 minutes.
- Spread the flat side of 12 cakes with the cream cheese frosting. Top each with another cake.
Thanks guys and enjoy!!!
Monday, July 30, 2012
Monkey Bread aka Pull Apart Bread
Hello, how is everyone doing? I am excited because this past weekend was my nephews 7th birthday. We had an amazing time at Cedar Point and I cannot believe my nephew turned 7! I remember holding him in my arms when he was just a baby.
My sister, my nephews mother, loves Monkey bread, and well so do I of course, so every time I visit I am asked to make it. This recipe cannot be simpler. This is a great dessert as well as a great brunch dish. I hope you guys try this and enjoy.
Here's how to do it:


Ingredients/recipe
4 cans of biscuits
1 cup of sugar
2 ts of cinnamon or more to taste
1 cup of butter (2 sticks of butter)
1/2 cup of brown sugar
1 ts of vanilla
Pre-heat your oven to 350.
Cut each biscuits into four quarters. Mix the 1 cup of sugar and 2 ts of cinnamon in a zip lock bag or a dish. Put the cut biscuits into the zip lock bag and shake or dip them into the dish. Place the coated pieces into a bundt pan or a 9x13 (its easier to turn over if made in the bundt pan).
Melt the butter, brown sugar and what is ever left of the cinnamon sugar mixture in a pot. Heat until the sugar is dissolved, about 5 minutes. Take off the heat and add in the vanilla. Pour over the coated biscuits. Place in the oven and cook for about 30 minutes or until bubbly and brown.
Once it is cooked, take out of the oven and let sit for about 5 minutes that flip onto a large plate or board. Pull apart, or cut into pieces and enjoy!
Enjoy!
Friday, July 20, 2012
Funfetti Snickers Cake Mix Bars
Hello and Happy Friday! I hope everyone is doing well and I hope everyone has a great weekend. I am super excited that the weather has cooled off for a brief moment so I can show you guys a super simple dessert. Its only four ingredients and you can mix and match this however you like. It was inspired by Rolo Cake Mix Bars and I decided to make these because I need a quick treat for an amazing dinner I was invited to.
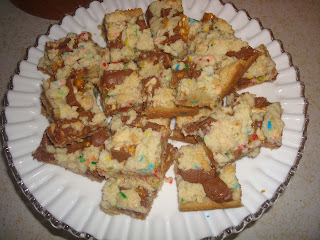
I had all of these ingredients on hand and decided to save money by sticking with these bars. I also wanted something simple too. All you need for this is a white cake mix, I only had a Funfetti mix so I used that, 5 oz of evaporated mix, 1/4 cup of butter and a candy of your choice. The original called for Rolos, but I knew I had the Snickers so I went with those. Since the Snickers are bigger than Rolo's, I chopped them into 3rds and placed them all over the cake mix. You guys this is super simple and quick I hope you guys try these and enjoy!
Here's how you do it:

Ingredients/Recipe
Adapted From Cookies and Cups
1 box (18.25 oz) Funfetti Cake Mix, or your choice, make sure it is 18.25 oz
5 oz evaporated milk
1/4 cup butter, melted
Around 15 Fun Size Snicker, cut into 3rds, or use as many as you like
Preheat oven to 350°
Spray a 9x13 pan with cooking spray. In a bowl or mixer, beat cake mix, evaporated milk and butter until combined. The mixture will be thick and very sticky. Make a ball with the batter and divide it in half. Press 1 half into the bottom of the pan. **
Bake about 7 minutes and remove from oven and place the Snickers candies all over the cake base. Place the remaining batter on top of the Snickers. (See Note)
Bake for 20-24 minutes longer until top begins to golden.
Cool completely before cutting into squares.**
**Notes:
I find that when working with the batter, to have a small bowl filled with water, dip your fingers in the water so they are slightly moistened then press the cake on the bottom of the pan. This also helps when dropping teaspoons of the batter over the Snickers.
The bottom base will darken a little more than the top. Just watch so you don't over bake. Mine turned out fine.
I find that these taste even better the next day.
I hope you guys try these and enjoy!
I had all of these ingredients on hand and decided to save money by sticking with these bars. I also wanted something simple too. All you need for this is a white cake mix, I only had a Funfetti mix so I used that, 5 oz of evaporated mix, 1/4 cup of butter and a candy of your choice. The original called for Rolos, but I knew I had the Snickers so I went with those. Since the Snickers are bigger than Rolo's, I chopped them into 3rds and placed them all over the cake mix. You guys this is super simple and quick I hope you guys try these and enjoy!
Here's how you do it:
 |
| this is the base, baked, and the Snickers on top. Feel free to use as many as you want. |


Ingredients/Recipe
Adapted From Cookies and Cups
1 box (18.25 oz) Funfetti Cake Mix, or your choice, make sure it is 18.25 oz
5 oz evaporated milk
1/4 cup butter, melted
Around 15 Fun Size Snicker, cut into 3rds, or use as many as you like
Spray a 9x13 pan with cooking spray. In a bowl or mixer, beat cake mix, evaporated milk and butter until combined. The mixture will be thick and very sticky. Make a ball with the batter and divide it in half. Press 1 half into the bottom of the pan. **
Bake about 7 minutes and remove from oven and place the Snickers candies all over the cake base. Place the remaining batter on top of the Snickers. (See Note)
Bake for 20-24 minutes longer until top begins to golden.
Cool completely before cutting into squares.**
**Notes:
I find that when working with the batter, to have a small bowl filled with water, dip your fingers in the water so they are slightly moistened then press the cake on the bottom of the pan. This also helps when dropping teaspoons of the batter over the Snickers.
The bottom base will darken a little more than the top. Just watch so you don't over bake. Mine turned out fine.
I find that these taste even better the next day.
I hope you guys try these and enjoy!
Monday, July 16, 2012
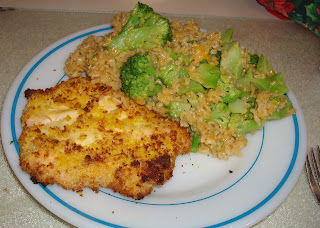
Light Breaded Chicken and Cheese Broccoli Rice
Hello everyone! I hope everyone is doing well. While I didn't do to much this weekend, I did get invited for a really nice dinner and I got to bake! You can't go to someones house for dinner and not bring a dessert. That will be shared later this week or maybe next week. Thankfully it wasn't that hot so turning on the oven wasn't so bad.
How is everyone surviving this heatwave? I've been trying to stay cool, but it is really hard especially when the air conditioning doesn't work where I work. Does anybody else feel that the heat drains all the energy out of them? I don't feel like doing anything! I hate being lazy, but I really just want to lay around. Does anybody feel me?
Well lets talk about some food. For today I have an easy Chicken and Rice dinner. It's also light if your watching your waist line, but very fulfilling. You bread the chicken, but instead of putting the chicken in flour than eggs than breadcrumbs, you skip the first too and use mustard. You can use any mustard, but for this one I used normal mustard.
With the rice, I cooked up brown rice with broccoli and light cheese. You mix the cheese in at the end after the liquid is fully evaporated from the rice. Its super simple and I hope you guys like it.
Here's how to do it.
Ingredients/recipe
Breaded Chicken
4 Skinless Chicken Breast, pounded thin
1/4 cup or more of Mustard of your choice
1 1/2 -2 Cups of Panko Breadcrumbs (or as much as needed)
Salt and pepper to taste
Cheese Broccoli and Brown Rice
4 servings of Brown Rice, Cooked according to package directions
2 cups of Broccoli
1 Cup of 2% cheese or to taste
First preheat your oven to 350. Prepare a baking pan with a cooling rack sitting on top, if you are able to do this. This will help so air circulates around the chicken breast making sure one sides doesn't get soggy. Make sure you spay the pan and rack with Pam.
Pound your chicken breast to thin cutlets if desired. Place your mustard in a dish and your Panko breadcrumbs in another dish, add salt and pepper if desired.
Brush your chicken breast with the mustard. I find this the easiest way to make sure the breast is fully covered with mustard. Dip the chicken in the breadcrumbs, adding more if needed. Place the chicken on the cooling rack.
Once all the chicken has been breaded, place in the oven and bake for about 20 minutes if you pounded them thin. Also if you want a really crisp crust place the chicken under the broiler for a seconds.
For the rice, I like to cook it in chicken broth, it gives it more flavor. Add the rice and broccoli. Once all the broth has evaporated, add the cheese and stir until melted. If you want to add a little more cheese you can do whatever you like to taste.
I hope you guys try this. It really is simple and enjoy!!
How is everyone surviving this heatwave? I've been trying to stay cool, but it is really hard especially when the air conditioning doesn't work where I work. Does anybody else feel that the heat drains all the energy out of them? I don't feel like doing anything! I hate being lazy, but I really just want to lay around. Does anybody feel me?
Well lets talk about some food. For today I have an easy Chicken and Rice dinner. It's also light if your watching your waist line, but very fulfilling. You bread the chicken, but instead of putting the chicken in flour than eggs than breadcrumbs, you skip the first too and use mustard. You can use any mustard, but for this one I used normal mustard.
With the rice, I cooked up brown rice with broccoli and light cheese. You mix the cheese in at the end after the liquid is fully evaporated from the rice. Its super simple and I hope you guys like it.
Here's how to do it.

Ingredients/recipe
Breaded Chicken
4 Skinless Chicken Breast, pounded thin
1/4 cup or more of Mustard of your choice
1 1/2 -2 Cups of Panko Breadcrumbs (or as much as needed)
Salt and pepper to taste
Cheese Broccoli and Brown Rice
4 servings of Brown Rice, Cooked according to package directions
2 cups of Broccoli
1 Cup of 2% cheese or to taste
First preheat your oven to 350. Prepare a baking pan with a cooling rack sitting on top, if you are able to do this. This will help so air circulates around the chicken breast making sure one sides doesn't get soggy. Make sure you spay the pan and rack with Pam.
Pound your chicken breast to thin cutlets if desired. Place your mustard in a dish and your Panko breadcrumbs in another dish, add salt and pepper if desired.
Brush your chicken breast with the mustard. I find this the easiest way to make sure the breast is fully covered with mustard. Dip the chicken in the breadcrumbs, adding more if needed. Place the chicken on the cooling rack.
Once all the chicken has been breaded, place in the oven and bake for about 20 minutes if you pounded them thin. Also if you want a really crisp crust place the chicken under the broiler for a seconds.
For the rice, I like to cook it in chicken broth, it gives it more flavor. Add the rice and broccoli. Once all the broth has evaporated, add the cheese and stir until melted. If you want to add a little more cheese you can do whatever you like to taste.
I hope you guys try this. It really is simple and enjoy!!
Friday, July 13, 2012
Cupcake of the month-Mini Red Velvet Cupcakes
Hello and Happy Friday! I hope everyone had an easy week and have lots of plans for the weekend. Beside working, I am going to keeping myself busy hopefully by cooking and baking and of course working. I am super excited for my nephews birthday which is coming up very soon. We are going to spend the day at Cedar Point and I love roller coasters so I can't wait!
Today I wanted to offer you guys a southern treat, Red Velvet Cupcakes. My roommate received a container of Cream Cheese Frosting and wanted to put it to good use so I decided to go with these cupcakes. Red Velvet has become extremely popular these days and I have made a Red Velvet Cake, but it came out a little dry (I think I know what I did wrong). I went to my favorite site Brown Eyed Baker and found the recipe there. It has a nice crumb and has a slight chocolate flavor. I doubled the recipe and made 72 minis, but you can make a normal batch if you like.
I have also included a cream cheese frosting recipe because the stuff in the tube just doesn't cut it. The frosting is really easy, so I would give it a try if its your first time making a cream cheese frosting. I hope you guys like these and enjoy!
Here's how to do it:
Ingredients/Recipe
This recipe is for normal sized cupcakes, about 12. If you want to make the minis it should make 24 and only bake for about 10-13 minutes.
From Brown Eyed Baker
4 tablespoons unsalted butter, at room temperature
¾ cup granulated sugar
1 egg
2½ tablespoons unsweetened cocoa powder
3 tablespoons red food coloring
½ teaspoon vanilla extract
½ cup buttermilk
1 cup + 2 tablespoons all-purpose flour
½ teaspoon salt
½ teaspoon baking soda
1½ teaspoons distilled white vinegar
1. Preheat oven to 350 degrees F. Line a muffin/cupcake pan with liners.
2. On medium-high speed, cream the butter and sugar until light and fluffy, about 3 minutes. Turn the mixer to high and add the egg. Scrape down the bowl and beat until well incorporated.
3. In a separate small bowl, mix together the cocoa powder, vanilla extract and red food coloring to make a thick paste. Add to the batter and mix on medium speed until completely combined. You may need to stop the mixer to scrape the bottom of the bowl, making sure that all the batter gets color.
4. Reduce the mixer speed to low and slowly add half of the buttermilk. Add half of the flour and mix until combined. Scrape the bowl and repeat the process with the remaining milk and flour. Beat on high until smooth.
5. Again, reduce the mixer speed to low and add the salt, baking soda and vinegar. Turn to high and beat for another couple of minutes until completely combined and smooth.
6. Divide the batter evenly between the cupcake liners and bake for about 20 minutes, or until a thin knife or skewer inserted into the center of the largest cupcake comes out clean.
7. Cool for about 10 minutes and then remove cupcakes from the pan and place them on a cooling rack to cool completely before frosting.
Cream Cheese Frosting
From the Food Network
4 ounces unsalted butter, softened
4 ounces cream cheese, softened
2 cups powdered sugar
1 teaspoon vanilla extract
I hope you guys like these and as always enjoy!
Today I wanted to offer you guys a southern treat, Red Velvet Cupcakes. My roommate received a container of Cream Cheese Frosting and wanted to put it to good use so I decided to go with these cupcakes. Red Velvet has become extremely popular these days and I have made a Red Velvet Cake, but it came out a little dry (I think I know what I did wrong). I went to my favorite site Brown Eyed Baker and found the recipe there. It has a nice crumb and has a slight chocolate flavor. I doubled the recipe and made 72 minis, but you can make a normal batch if you like.
I have also included a cream cheese frosting recipe because the stuff in the tube just doesn't cut it. The frosting is really easy, so I would give it a try if its your first time making a cream cheese frosting. I hope you guys like these and enjoy!
Here's how to do it:
 |
| Look at that red color! |
Ingredients/Recipe
This recipe is for normal sized cupcakes, about 12. If you want to make the minis it should make 24 and only bake for about 10-13 minutes.
From Brown Eyed Baker
4 tablespoons unsalted butter, at room temperature
¾ cup granulated sugar
1 egg
2½ tablespoons unsweetened cocoa powder
3 tablespoons red food coloring
½ teaspoon vanilla extract
½ cup buttermilk
1 cup + 2 tablespoons all-purpose flour
½ teaspoon salt
½ teaspoon baking soda
1½ teaspoons distilled white vinegar
1. Preheat oven to 350 degrees F. Line a muffin/cupcake pan with liners.
2. On medium-high speed, cream the butter and sugar until light and fluffy, about 3 minutes. Turn the mixer to high and add the egg. Scrape down the bowl and beat until well incorporated.
3. In a separate small bowl, mix together the cocoa powder, vanilla extract and red food coloring to make a thick paste. Add to the batter and mix on medium speed until completely combined. You may need to stop the mixer to scrape the bottom of the bowl, making sure that all the batter gets color.
4. Reduce the mixer speed to low and slowly add half of the buttermilk. Add half of the flour and mix until combined. Scrape the bowl and repeat the process with the remaining milk and flour. Beat on high until smooth.
5. Again, reduce the mixer speed to low and add the salt, baking soda and vinegar. Turn to high and beat for another couple of minutes until completely combined and smooth.
6. Divide the batter evenly between the cupcake liners and bake for about 20 minutes, or until a thin knife or skewer inserted into the center of the largest cupcake comes out clean.
7. Cool for about 10 minutes and then remove cupcakes from the pan and place them on a cooling rack to cool completely before frosting.
Cream Cheese Frosting
From the Food Network
Ingredients
4 ounces cream cheese, softened
2 cups powdered sugar
1 teaspoon vanilla extract
In a large bowl, beat together the butter and
cream cheese with an electric mixer. With the mixer on low speed, add
the powdered sugar a cup at a time until smooth and creamy. Beat in the vanilla extract
I hope you guys like these and as always enjoy!
Monday, July 9, 2012
On the healthy side...Cheeseburger Salad
Hello everyone!!! I hope everyone had a great weekend. I finally got on the ball again and worked out! Ya go me! LOL. I didn't go to long, because I wanted to work back into it, but as painful as it was, I felt better afterwards. I am trying to be good and stay on top of my healthy, but you know me I can never pass up a cake or any dessert at that. Everything in moderation though.
I went to the gym thinking that it would be kind of slow, but it was pretty busy, keep in mind this was Sunday afternoon. I am the type of person who likes to work out along or with a friend. I hate thinking that people are watching me, but I guess a lot of people do. I've been told that no one really watches, but I used to work at a fitness center and every once in awhile someone would say something to me about another member. You can't let that hold you back though. Keep going and push yourself.
On to the food. Since I worked out, and have been having many treats on my site lately, which wont go away trust me, I wanted to give you guys something that was a healthy but satisfying.
Cheeseburger salad. Yes, you can have a healthy cheeseburger while eating well. This is made from ground turkey, but you can use lean ground beef or chicken. The meat is flavored with Worcestershire sauce, onions and steak seasoning. You put all of this on a salad, any kind you want. I listed what I used on mine, but feel free to mix it up anyway you want, I'm not looking. You top this salad off with an easy mustard vinaigrette.
Here's how you do it:

Ingredients/recipe
Adapted From Rachael Ray
Burgers
1 1/2 pounds ground sirloin or ground turkey
1/4 cup finely chopped onion, eyeball it
1 tablespoon Worcestershire sauce
2 teaspoons steak seasoning blend or coarse salt and ground black pepper
Extra-virgin olive oil, for drizzling
3/4 pound brick sharp Cheddar (recommended: Cabot brand or Cracker Barrel brand* )
Salad
3 large hearts romaine lettuce
1 cup sliced pickles, patted dry
1 cup grape tomatoes
1 Cucumber sliced
3 tablespoons yellow mustard
2 tablespoons apple cider vinegar
1/2 cup EVOO
Salt and Pepper
Combine the meat with onion, Worcestershire and steak seasoning or salt and pepper. Form 2-inch meatballs, then flatten them into patties. Drizzle formed mini patties with extra-virgin olive oil to keep them from sticking to cooking surface.
Slice the brick of cheese into 1/4-inch pieces. Place patties into your skillet. Cook the mini burgers for 3 minutes on each side then add cheese to melt over patties. If you cheese is not melting, cover loosely with foil.
While the burgers are cooking, coarsely chop romaine and combine with sliced pickles and halved grape tomatoes.
Whisk together the mustard and cider vinegar. Stream in the extra-virgin olive oil. Season with salt and pepper.
Arrange mini cheeseburgers on salad and drizzle the vinagrette over the salad. Serve and enjoy!
I really hope you guys try this one, its simple, healthy and did I mention 30 minutes?! It is!
Enjoy!
I went to the gym thinking that it would be kind of slow, but it was pretty busy, keep in mind this was Sunday afternoon. I am the type of person who likes to work out along or with a friend. I hate thinking that people are watching me, but I guess a lot of people do. I've been told that no one really watches, but I used to work at a fitness center and every once in awhile someone would say something to me about another member. You can't let that hold you back though. Keep going and push yourself.
On to the food. Since I worked out, and have been having many treats on my site lately, which wont go away trust me, I wanted to give you guys something that was a healthy but satisfying.
Cheeseburger salad. Yes, you can have a healthy cheeseburger while eating well. This is made from ground turkey, but you can use lean ground beef or chicken. The meat is flavored with Worcestershire sauce, onions and steak seasoning. You put all of this on a salad, any kind you want. I listed what I used on mine, but feel free to mix it up anyway you want, I'm not looking. You top this salad off with an easy mustard vinaigrette.
Here's how you do it:

Ingredients/recipe
Adapted From Rachael Ray
Burgers
1 1/2 pounds ground sirloin or ground turkey
1/4 cup finely chopped onion, eyeball it
1 tablespoon Worcestershire sauce
2 teaspoons steak seasoning blend or coarse salt and ground black pepper
Extra-virgin olive oil, for drizzling
3/4 pound brick sharp Cheddar (recommended: Cabot brand or Cracker Barrel brand* )
Salad
3 large hearts romaine lettuce
1 cup sliced pickles, patted dry
1 cup grape tomatoes
1 Cucumber sliced
3 tablespoons yellow mustard
2 tablespoons apple cider vinegar
1/2 cup EVOO
Salt and Pepper
Directions
Preheat a large nonstick skillet over medium high heat(you can use your grill if you want)
Combine the meat with onion, Worcestershire and steak seasoning or salt and pepper. Form 2-inch meatballs, then flatten them into patties. Drizzle formed mini patties with extra-virgin olive oil to keep them from sticking to cooking surface.
Slice the brick of cheese into 1/4-inch pieces. Place patties into your skillet. Cook the mini burgers for 3 minutes on each side then add cheese to melt over patties. If you cheese is not melting, cover loosely with foil.
While the burgers are cooking, coarsely chop romaine and combine with sliced pickles and halved grape tomatoes.
Whisk together the mustard and cider vinegar. Stream in the extra-virgin olive oil. Season with salt and pepper.
Arrange mini cheeseburgers on salad and drizzle the vinagrette over the salad. Serve and enjoy!
I really hope you guys try this one, its simple, healthy and did I mention 30 minutes?! It is!
Enjoy!
Subscribe to:
Posts (Atom)